Unit 3 · 14 min read
BIOS/UEFI, Disk Partitioning and Operating System Installation
What the syllabus asks for 6
- BIOS and UEFI
- Disks, partitions and file systems
- Installing Windows
- Installing Ubuntu Linux (and dual boot)
- Drivers, updates, imaging and recovery
- Eight tips for a safe operating-system installation
A built PC is still an empty machine. This unit covers the firmware that starts it, the structure of disks and partitions, and a complete installation of Windows and of Linux, including dual boot and recovery. It ends with drivers, updates and backup.
- BIOS versus UEFI; the settings you must know; the boot sequence.
- Partition tables (MBR, GPT), file systems, and calculations of limits.
- Step-by-step Windows 11/10 and Ubuntu installation; dual boot.
- Drivers, updates, imaging and recovery.
3.1 BIOS and UEFI
BIOS (Basic Input/Output System) is the legacy firmware on the motherboard; UEFI (Unified Extensible Firmware Interface) replaces it with a graphical interface, faster boot, support for disks above 2 TiB (GPT), network features and Secure Boot.
| BIOS (legacy) | UEFI | |
|---|---|---|
| Partition table | MBR | GPT (also reads MBR in CSM mode) |
| Max boot disk | 2 TiB | 9.4 ZB theoretically |
| Interface | text, keyboard | graphical, mouse |
| Boot speed | slower | faster |
| Security | none | Secure Boot, TPM support |
Enter setup with Del, F2, F10, F12 or Esc during the logo. Settings to know:
- Boot order / boot menu: choose USB or DVD for installation, then the system disk.
- Date and time: wrong time breaks certificates and logins.
- SATA mode: AHCI (normal), RAID, or IDE (legacy). Changing AHCI/RAID after Windows is installed can stop it booting.
- Virtualisation (Intel VT-x / AMD-V): enable for virtual machines.
- XMP / EXPO profile: enables rated RAM speed.
- Secure Boot and TPM: needed by Windows 11.
- Fan curves, CPU temperature, boot password / supervisor password.
- Clear CMOS (jumper or removing the battery for a minute) resets forgotten settings or a bad overclock.
- Update the firmware (flash) only with a stable power supply; a failed update can brick the board.
Boot sequence. Power → firmware POST → finds the boot device → loads the boot loader (Windows Boot Manager, GRUB) from the EFI System Partition (UEFI) or the MBR (BIOS) → loads the OS kernel → services and login.
3.2 Disks, partitions and file systems
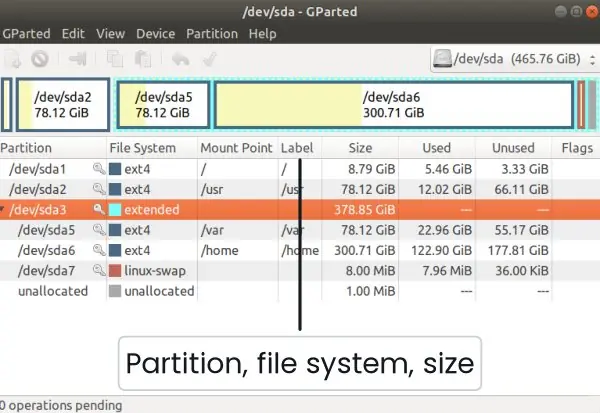
A disk is divided into partitions, each formatted with a file system. The partition table records where each starts and ends.
| Scheme | Limits |
|---|---|
| MBR (Master Boot Record) | max 2 TiB disk; 4 primary partitions (or 3 primary + 1 extended with logical drives) |
| GPT (GUID Partition Table) | disks above 2 TiB; up to 128 partitions in Windows; needs UEFI to boot |
The MBR limit comes from 32-bit sector addresses: 2³² × 512 bytes = 2,199,023,255,552 bytes = 2 TiB. A 4 TB disk under MBR leaves about 2 TB unusable.
| File system | Used by | Notes |
|---|---|---|
| NTFS | Windows | permissions, compression, journaling, large files |
| FAT32 | USB sticks, EFI partition | max file 4 GiB, broad compatibility |
| exFAT | flash drives, SD cards | large files, no journaling |
| ext4 | Linux | journaling, standard on most distros |
| APFS / HFS+ | macOS |
A typical UEFI/GPT Windows layout: EFI System Partition (100 to 500 MB, FAT32) + Microsoft Reserved (16 MB) + C: (NTFS) + Recovery partition.
A typical Ubuntu layout: EFI partition + / (ext4, at least 25 GB) + optional /home + swap (about the size of RAM for hibernation, or a swap file).
Partition planning example. A "512 GB" SSD holds 512 × 10⁹ bytes = 476.8 GiB, and partition tools show GiB.
A dual-boot plan: EFI 0.5 + Windows C: 180 + Ubuntu / 80 + Ubuntu /home 120 + shared data 60 + swap 16 = 456.5 GiB, which leaves about 20 GiB (4 %) unallocated as spare room and for SSD over-provisioning.


3.3 Installing Windows
- Prepare: download the official ISO from Microsoft; create a bootable USB (Media Creation Tool or Rufus, USB at least 8 GB); back up the data; note the licence key (or use a digital licence linked to your account); check the minimum requirements.
- Boot from USB: press the boot-menu key, choose the UEFI: USB entry.
- Language, edition and licence; choose Custom: Install Windows only.
- Partitioning: select the unallocated space and click New (Windows creates the system partitions), or delete old partitions to start fresh. Deleting a partition erases its data.
- Copy and restart; remove the USB when it reboots the first time.
- First-run set-up: region, keyboard, network, account (local or Microsoft), privacy options.
- Post-install: install drivers (chipset, graphics, LAN, Wi-Fi, audio) from the manufacturer's site, run Windows Update, install an antivirus or enable Defender, install applications, create a restore point and a system image, and activate Windows.
3.4 Installing Ubuntu Linux (and dual boot)
- Prepare a live USB with the official ISO (Rufus or
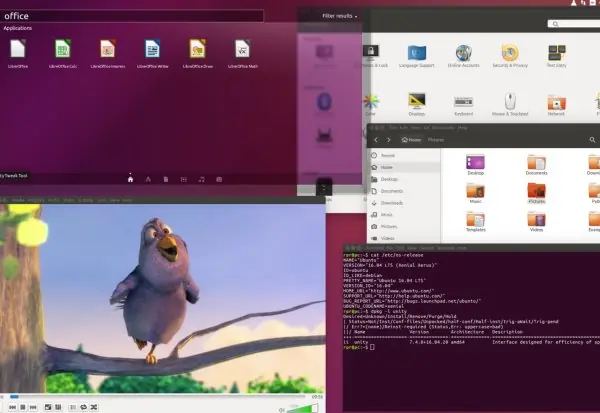
dd); disable fast start-up and hibernation in Windows if dual-booting; shrink the Windows partition in Disk Management to free space; back up. - Boot the USB and choose Try Ubuntu (test hardware: Wi-Fi, display, touchpad) or Install Ubuntu.
- Installation type: Erase disk for a single-OS machine; Install alongside Windows for dual boot; or Something else for manual partitions (EFI,
/,/home, swap). - Region, keyboard, user name and password; the installer copies files and installs GRUB which offers a choice of Ubuntu or Windows at each start.
- Reboot, remove the USB, log in, and run
sudo apt update && sudo apt upgrade. Install extra drivers from Additional Drivers if needed.
Useful commands after installation: lsblk (disks), df -h (space used), free -h (memory), lscpu, sudo fdisk -l, ip a (network), ubuntu-drivers devices. A live USB is also the best repair tool: boot it to copy files off a PC that no longer starts.
Virtual machines let you practise safely: VirtualBox or VMware (enable virtualisation in the BIOS), allocate 2 CPUs, 4 GB RAM, 25 GB disk, attach the ISO and install exactly as above, with no risk to the host.
3.5 Drivers, updates, imaging and recovery
- Driver: software that lets the OS use a device. Download from the manufacturer, not from random sites. Check Device Manager (Windows) for yellow warning icons.
- Updates: apply OS and firmware updates for security; keep a restore point before major updates.
- Backup methods: file backup (copy files), system image (a full copy of the OS and apps, restorable to a new disk), cloning (disk-to-disk, for upgrading to an SSD). Follow the 3-2-1 rule: three copies, on two media types, one off-site.
- Recovery: Safe Mode (minimal drivers), System Restore, Startup Repair, Reset this PC, boot-loader repair (
bootrec /fixmbr,/fixboot,/rebuildbcdfrom the recovery command prompt; for GRUB,boot-repairorgrub-install), and password reset only for your own device and with authority. - Data recovery: if a file is deleted by mistake, stop using the disk, because new writes overwrite the deleted data, and recover with tools such as Recuva or
testdisk/photorecfrom another disk or live USB.
3.6 Eight tips for a safe operating-system installation
- Back up first. Copy documents, photos and browser bookmarks to an external drive or cloud before touching the disk. Formatting a partition cannot be undone. A written list of installed programmes and licence keys also saves time later.
- Check the requirements. Windows 11 needs 4 GB RAM, 64 GB storage, UEFI with Secure Boot and TPM 2.0; Ubuntu runs well on 4 GB RAM and 25 GB. Machines that fail the check can use Windows 10 or a light Linux. Reading the requirements takes two minutes and avoids a failed install.
- Prepare a trusted installer. Download the ISO only from the official site and check its SHA-256 checksum. Write it to a USB with a tool such as Rufus, Ventoy or balenaEtcher. Pirated images often carry malware.
- Set the firmware correctly. Enter BIOS/UEFI with the right key (Del, F2, F10 or F12), and choose the USB in the boot menu. Keep the mode (UEFI or Legacy) the same as the disk partition style. A mismatch is the commonest reason for "no boot device".
- Plan the partitions. Give the OS 60 to 100 GB, keep data on a separate partition or drive and add an EFI partition on UEFI systems. For dual boot, shrink the Windows partition from inside Windows. Never resize while the disk has errors.
- Install Windows before Linux. Windows overwrites the boot loader; Ubuntu's GRUB can find Windows and add it to the menu. If the order is reversed, repair GRUB afterwards. Turn off Fast Startup in Windows for safe dual boot.
- Install drivers and updates. After the first boot install chipset, graphics, network and printer drivers, then run all updates. A computer with no network can still use a driver pack on a USB. Updates close security holes found since the ISO was built.
- Create a restore point or image. When the system is clean and working, save an image with a tool such as Clonezilla or Windows backup. A failed update or virus can then be undone in minutes instead of a full reinstall. Keep the image on a different disk.
Formula and fact sheet
- MBR: 2 TiB, 4 primary partitions. GPT: >2 TiB, 128 partitions, needs UEFI to boot.
- FAT32 max file 4 GiB; NTFS and ext4 for system disks; exFAT for portable drives.
- Windows 11 needs UEFI, Secure Boot, TPM 2.0.
- Install steps: ISO → bootable USB → boot menu → partition → copy → set-up → drivers → updates → backup.
- AHCI is the normal SATA mode; do not switch it after installation.
- 3-2-1 backup rule.
Chapter summary
- UEFI replaces BIOS and brings GPT, Secure Boot and speed; the settings to master are boot order, SATA mode, virtualisation and Secure Boot.
- Partition tables and file systems have hard limits that explain real-world behaviour (2 TiB MBR, 4 GiB FAT32).
- A clean install follows a fixed routine, and the work is not finished until drivers, updates and a backup are done.
- Virtual machines and live USBs are the safest places to practise and repair.
Practice
- Differentiate BIOS and UEFI in five points.
- Why can't MBR use more than 2 TiB? Show the calculation.
- Plan the partitions for a 256 GB SSD to run Windows and Ubuntu.
- Write the steps to install Windows from a USB stick on a new PC.
- What problems can arise after changing the SATA mode from IDE to AHCI?
- How would you recover files from a PC that no longer boots?
- Why disable fast start-up before dual-booting?
- Describe the difference between a file backup, a system image and a clone.
- A new 4 TB disk shows only 2 TB in Windows. Why and how to fix?
- List five post-installation tasks.
Answers and worked solutions
1. BIOS: MBR, 2 TiB, text interface, no Secure Boot, slower. UEFI: GPT, large disks, graphical, Secure Boot and TPM support, faster boot.
2. MBR uses 32-bit sector numbers: 2³² = 4,294,967,296 sectors × 512 B = 2,199,023,255,552 B = 2 TiB.
3. A 256 GB drive is about 238 GiB: EFI 0.5 GB, Windows 100 GB, Ubuntu / 50 GB, swap 8 GB, shared data 60 GB; total 218.5 GB leaves headroom for over-provisioning.
4. The seven steps of §3.3.
5. Windows may fail to boot (blue screen, INACCESSIBLE_BOOT_DEVICE) because the storage driver is not loaded for the new mode. Fix by enabling the driver first (safe mode switch) or revert the setting.
6. Boot a live USB (Ubuntu), mount the internal disk, copy the files to an external drive; or remove the drive and read it in another computer.
7. Fast start-up leaves the NTFS partition in a hibernated state; Linux may mount it read-only or corrupt it, and partition changes can destroy the Windows hibernation file.
8. File backup copies chosen files; a system image captures the whole OS, settings and apps for complete restore; a clone is an exact copy of a disk onto another disk, immediately bootable.
9. The disk was initialised as MBR. Back up, convert to GPT in Disk Management or diskpart (convert gpt), and create partitions for the full capacity.
10. Install chipset/graphics/LAN drivers, run Windows Update, install antivirus, install applications, create a restore point and system image, activate Windows.
Model answers: medium (5 marks) and long (10 marks) questions
Q (5 marks). Differentiate MBR and GPT. Why can a 4 TB disk not be fully used under MBR?
A partition table records where each partition starts and how long it is. MBR (Master Boot Record) stores a 64-byte table in the first sector of the disk with room for only four entries, each using 32-bit sector numbers.
GPT (GUID Partition Table) stores a header and up to 128 entries, with a backup copy at the end of the disk and a CRC checksum, and uses 64-bit sector numbers (Figure 3.2).
| Point | MBR | GPT |
|---|---|---|
| Firmware | BIOS (legacy) | UEFI (BIOS possible on some) |
| Maximum disk | 2 TiB | about 9.4 ZB |
| Partitions | 4 primary (or 3 + extended) | 128 in Windows |
| Table copy | one | primary and backup |
| Protection | none | CRC checks |
Calculation. The largest address is 2³² sectors × 512 bytes = 2,199,023,255,552 bytes = 2 TiB. A "4 TB" disk has 4 × 10¹² bytes, so about 1.8 TB (more than 40 %) would be unusable under MBR. Such a disk must be initialised as GPT.
Q (10 marks). Explain the roles of BIOS and UEFI, and describe the steps to install Windows and Ubuntu as a dual-boot system on one PC.
Introduction. Firmware is the first program that runs when a computer is switched on. It tests the hardware (POST), finds a boot device and hands control to the boot loader (Figure 3.1). Older PCs use BIOS; modern PCs use UEFI.
BIOS and UEFI compared.
| Point | BIOS | UEFI |
|---|---|---|
| Mode | 16-bit, text menus | 32/64-bit, graphical with mouse |
| Boot disk | MBR, up to 2 TiB | GPT and large disks |
| Boot speed | slower | faster |
| Security | none | Secure Boot |
| Boot files | first sector | .efi files in the EFI partition |
Preparation. Back up data, download both ISO files, make a bootable USB with Rufus or Ventoy, and check that the firmware is in UEFI mode. Turn off Fast Startup in Windows.
Installation steps.
- Boot from the Windows USB through the boot menu (F12 or similar).
- Choose custom install; create the EFI and C: partitions (for example 100 GB for Windows), and leave about 100 GB unallocated for Linux. Complete the installation and install drivers.
- Boot Windows once and check updates and drivers.
- Boot the Ubuntu USB; choose "Install Ubuntu" and "Install alongside Windows Boot Manager".
- Create the partitions in the free space:
/(ext4, 40 GB), swap (4 GB or equal to RAM for hibernation) and optionally/home; the EFI partition is shared. - Set the user name and password and install; GRUB is placed in the EFI partition.
- Restart: GRUB shows a menu with Ubuntu and Windows Boot Manager; test both.
| Problem | Cause | Fix |
|---|---|---|
| No Windows entry in GRUB | install order or fast startup | run sudo update-grub |
| Boots straight to Windows | boot order in UEFI | put Ubuntu/GRUB first |
| "No boot device" | UEFI/Legacy mismatch | match mode and partition style |
Conclusion. Understanding firmware, partition tables and boot loaders turns installation from a menu-clicking exercise into a controlled procedure.
The key habits are to back up first, install Windows before Linux, and keep the firmware mode consistent with the disk style.